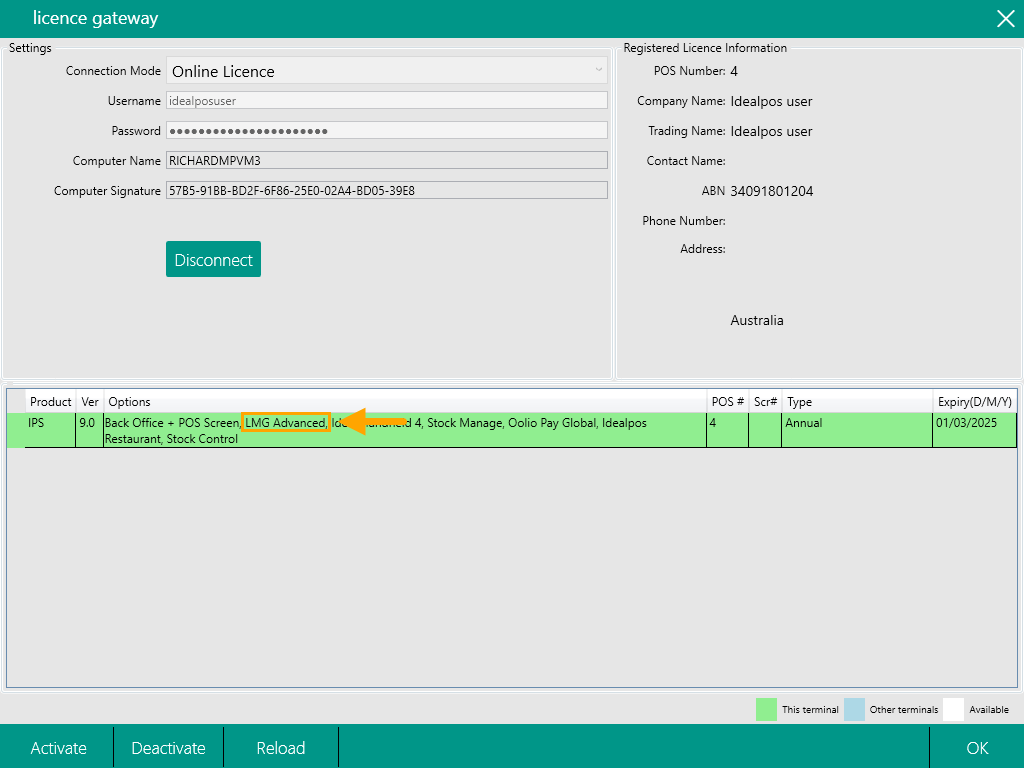
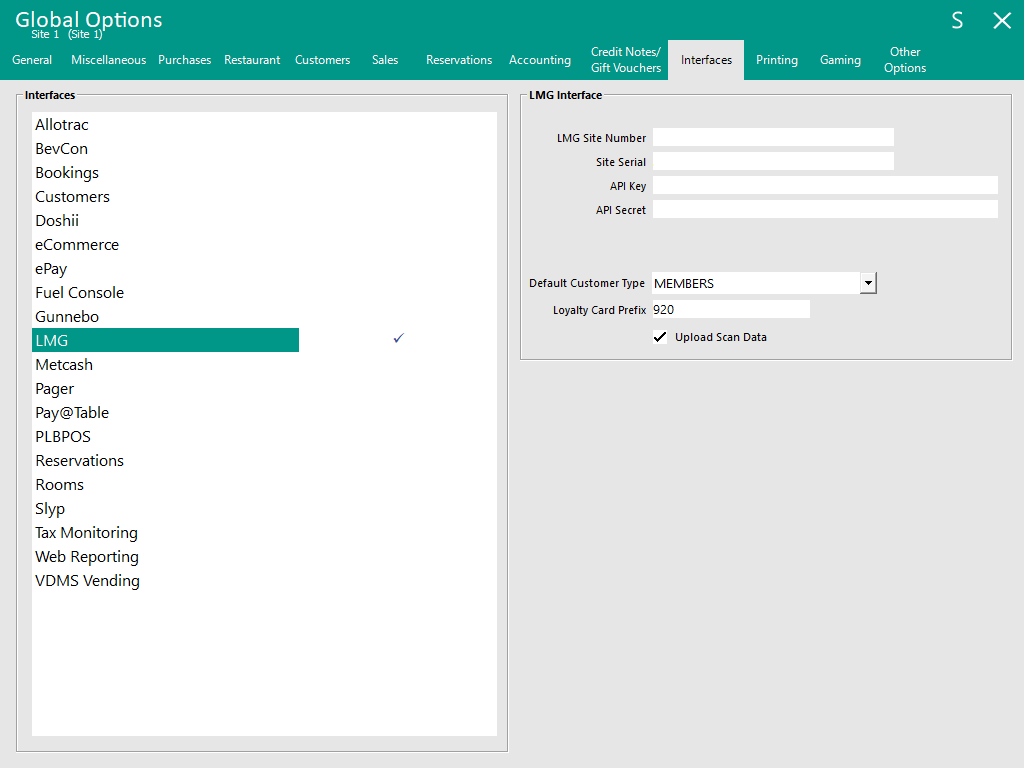
Go to: Back Office > Setup > Global Options > Interfaces > LMG.
Enter the credentials supplied by LMG:
- LMG Site Number
- Site Serial
- API Key
- API Secret
- Default Customer Type: Specify the default Customer Type that will be used for LMG Zen Loyalty.
- Loyalty Card Prefix: 920 (this prefix may vary depending on your Loyalty Program; enter the Loyalty Card Prefix as required for your setup/environment).
- Upload Scan Data: Enable
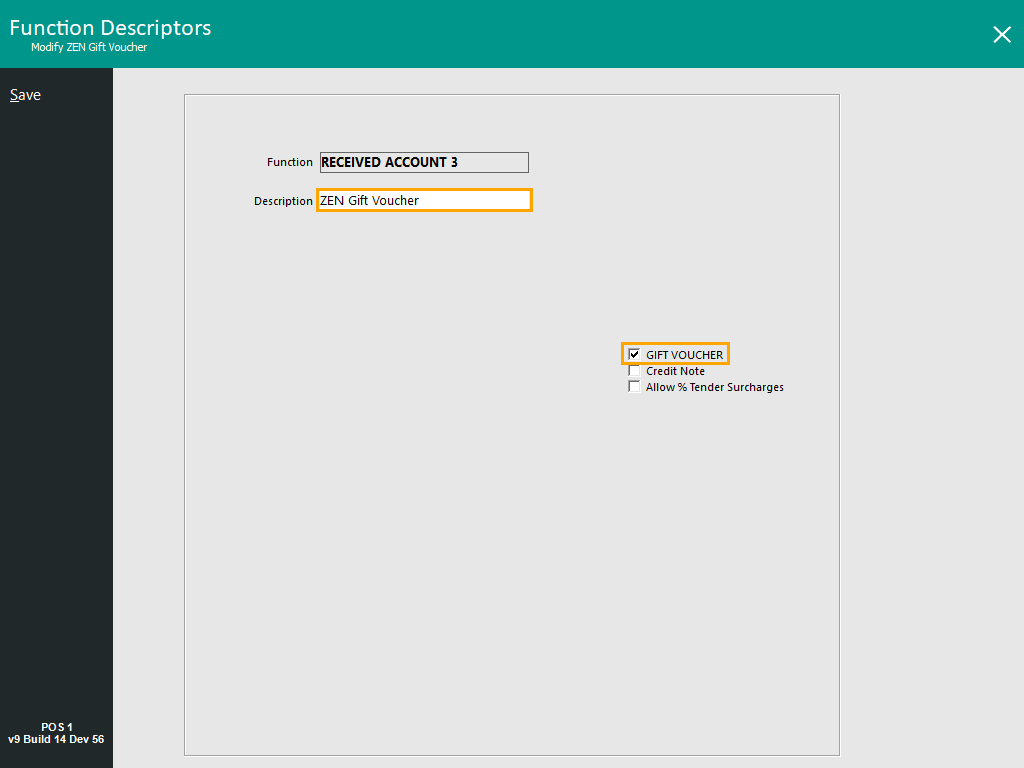
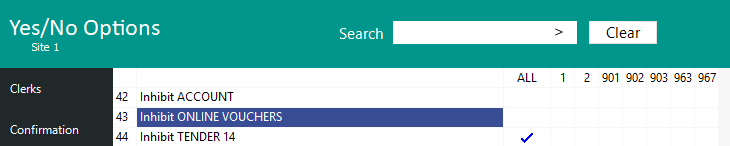
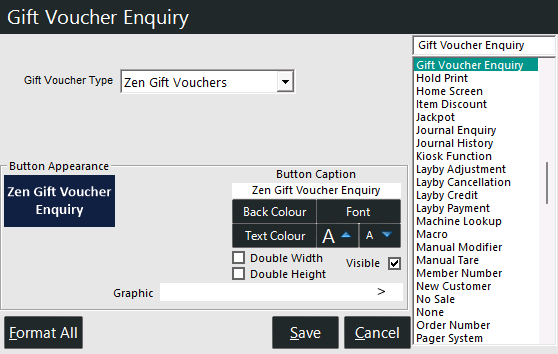
- Zen Gift Vouchers: Enable if using Zen Gift Vouchers. If using Zen Gift Vouchers, the Upload Scan Data option MUST be enabled for Gift Vouchers to function correctly!
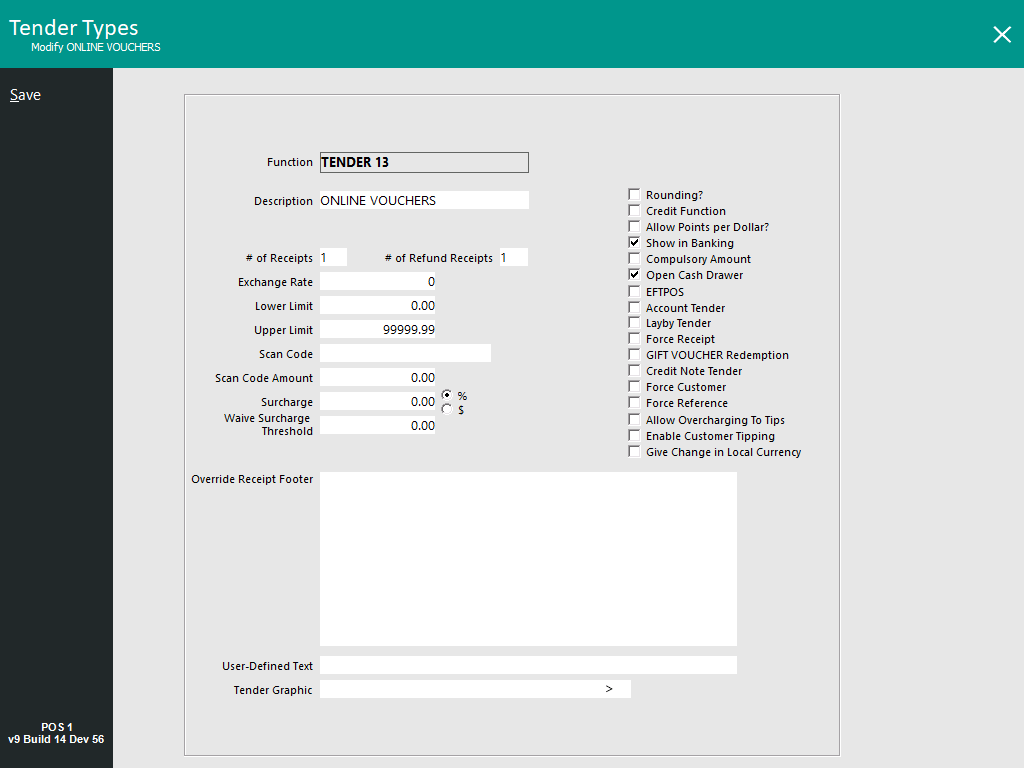
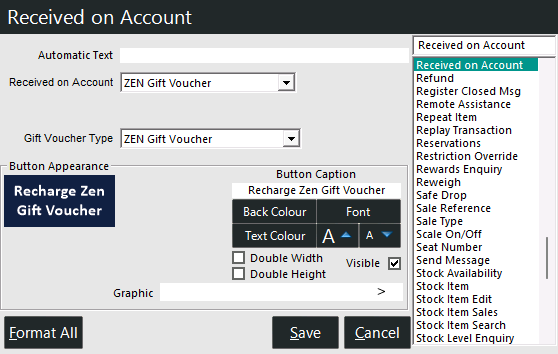
- Gift Voucher Redeem: If using Zen Gift Vouchers, select the Gift Voucher Tender Type configured above (e.g. ONLINE VOUCHERS).
CPI Pricing Import
This section is used for configuring fields which are used when importing a CPI Pricing data file from LMG.
When a CPI File is imported from LMG, the file will be searched for items which match the State, Banner and Pricing Zone that are configured in the following fields.
Any Stock Items in Idealpos which have a Scan Code or Alternate Code that match the Barcode in the CPI File for the configured State, Banner and Pricing Zone will be added to a Scheduled Price Change.
- State: Enter the State for the CPI Pricing Import (e.g. QLD). The States will appear in the "State" column of the CPI Pricing File.
- Banner: Enter the Banner for the CPI Pricing Import (e.g. Bottlemart). The Banners will appear in the "Banner Name" column of the CPI Pricing File.
- Pricing Zone: Enter the Pricing Zone for the CPI Pricing Import (e.g. 1). The Pricing Zones will appear in the "Pricing Zone" column of the CPI Pricing File.
The complete process for setting up and using the CPI Pricing Import functionality is available within the CPI Pricing Import page of the LMG topic.
After the credentials have been entered, close the Global Options.
The following prompt will be displayed - press "OK" and perform a Close Suite/Open Suite on all POS Terminals.
Alternatively, all POS Terminals can be physically restarted to apply the change.
Once done, the LMG Zen Loyalty Interface configuration has been completed and the Interface is ready for use.
Refer to the Using LMG Zen Loyalty Interface page for further information about using this interface.